Transferring the Global Database to SQL Server
Introduction
The Global Database is a project independent database of translations used by the Multi-Language Add-In to help you reuse common translations, in particular
| Automatic translation | Translations are inserted automatically into your project, if they exactly match a translation stored in the global database. This is most useful for common terms such as OK and Cancel. |
| Translation Memory | By pressing F3 whilst editing a translation, you can open a translation memory dialog. This dialog shows translations from the global database containing one or more of the same words as the current text. You can use cut and paste to copy words into the current translation. This helps you to translate technical terms in a consistent manner and may speed up the translation process. |
<Program Files>\<MultiLang>\GlobalTranslations.mdb
for example
c:\Program Files\MultiLang2005\GlobalTranslations.mdb
if you installed the Add-In Version for Visual Studio 2005/2008 on an English version of Windows.
Using SQL Server
You may prefer to use SQL server for the global database, for example:
- if you want to access a common database from different workstations
- if you consider SQL server more reliable than Access or
- to facilitate database backups.
To use SQL server instead of Access, you must
- create the database under SQL server and
- configure the database connection for the Add-In.
Import the global database using DTS
The easiest way to create the database under SQL server is to import the Access database using SQL Server Data Transformation Services (DTS). If you have a full version of SQL Server 2000 or 2005 installed, then DTS is probably installed as part of the SQL Server Enterprise Manager.
The following description assumes:
- that you are using SQL Server Express Edition and
- that the database server is already installed.
DTS is not installed by default with SQL Server Express Edition, but you can you can install it as part of the SQL Server Express Edition Toolkit. You can download the SQL Server Express Edition Toolkit with the link http://go.microsoft.com/fwlink/?LinkId=65111.
After installing it, you can start the DTS Wizard from the path:
<Program Files>\Microsoft SQL Server\90\DTS\Binn\DTSWizard.exe where <Program Files> is your (localized) program files directory (e.g. C:\Program Files, C:\Programme or C:\Archivos de Programas).
| In the first step, just click on Next. |
In the second step
|
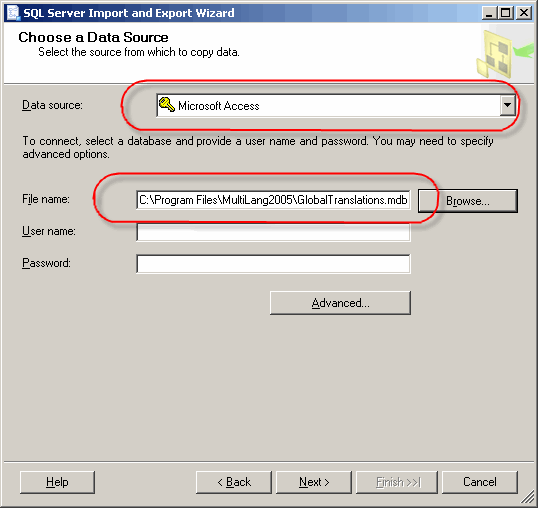
|
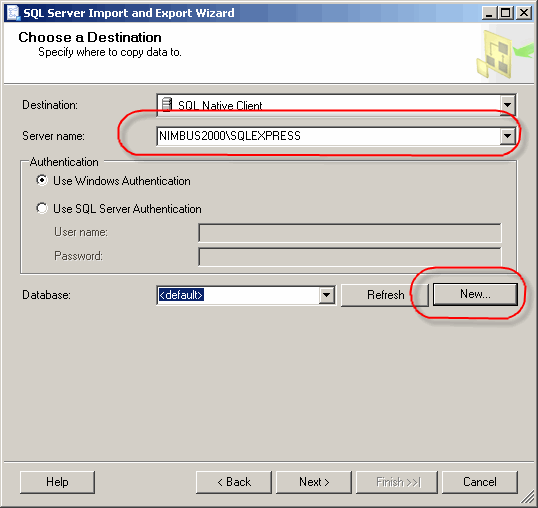
| In the third step, you must select the SQL server and the database on the server. You can either select the server name from the dropdown list, or type it in directly. (Depending on your network configuration, the list may not show all available database servers.) In most cases, you can probably connect to the database using Windows Authentication, but this is dependent on the configuration of your server. Although you can import the global database tables into an existing database, I recommend creating a new database on the server. To do this click on the New button. |
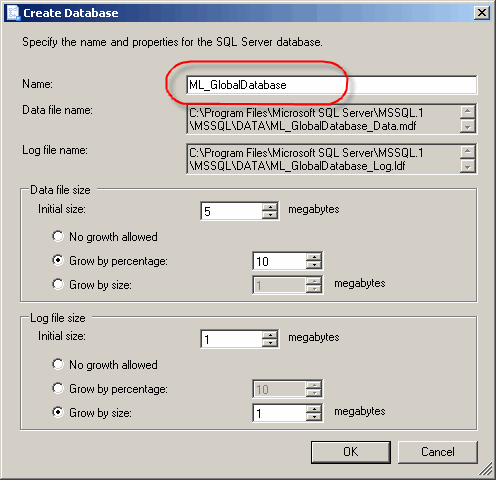
In this dialog, you must enter the name of the new database. I have entered the name ML_GlobalDatabase, but you can choose any name you like. You can leave all of the other set at their default values. Click on OK to create the database and return to the wizard. |
|
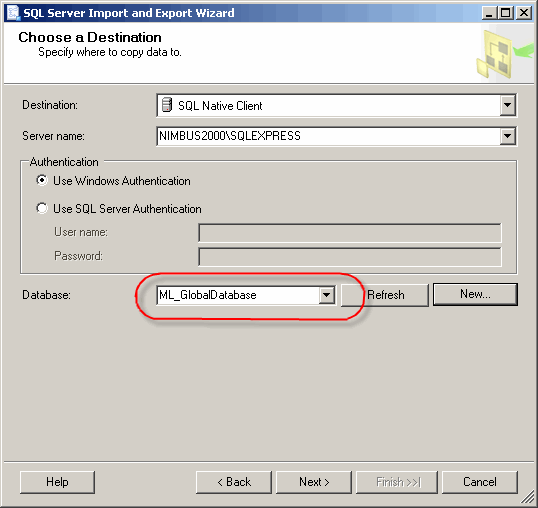
| The name of the new database should now be selected in the Database field. Click on Next to continue. |
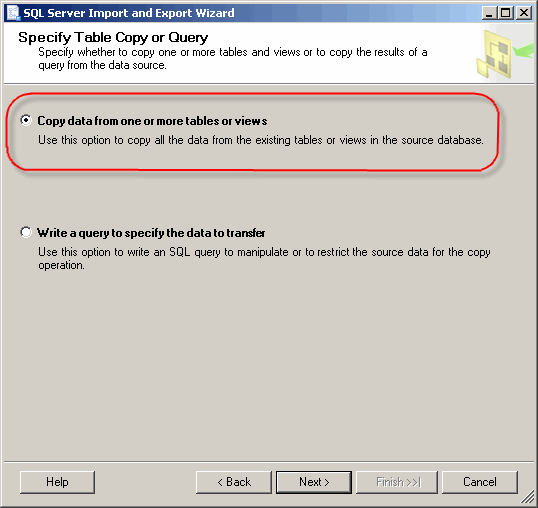
Leave the default selection Copy data from one or more tables or views. Click on Next to continue. |
|
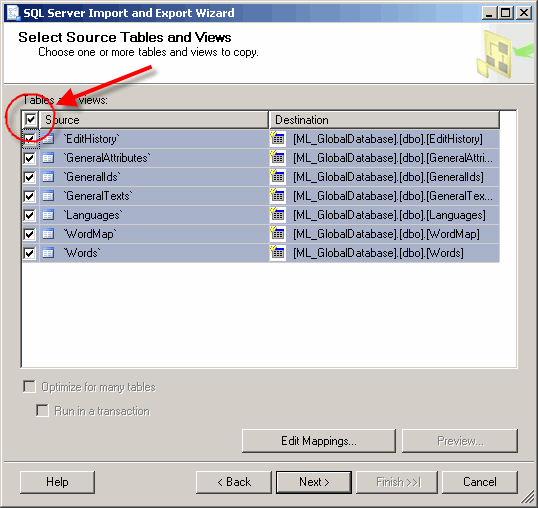
| Click on the check box in the title bar of the grid, to select all of the tables in global database. Click on Next to continue. |
Leave the default selection Execute immediately. Click on Next to continue. |

|
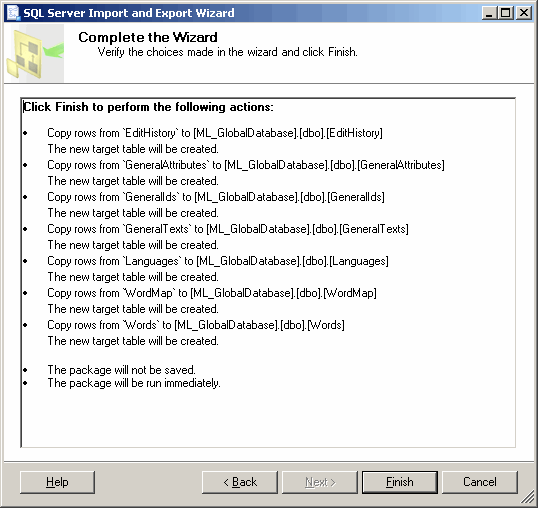
| The final page shows a summary of the operation. Click on Finish to continue. |
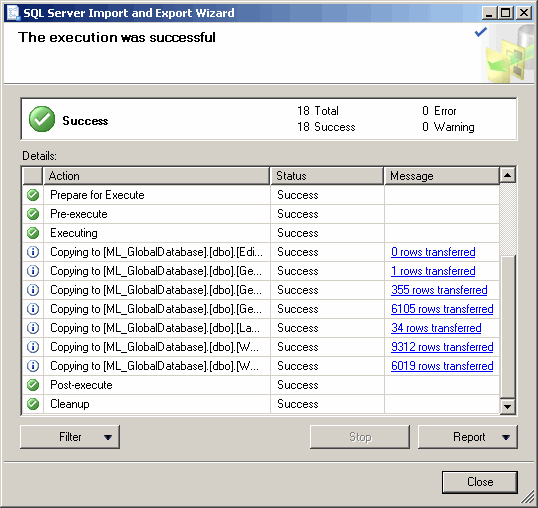
The import operation is now actually performed. On completion the dialog should look something like this. Click on Close to terminate the wizard. |
|
Configuring the connection in the Add-In
The following bitmaps are from Visual Studio 2008, but the operation is basically similar for the VB6 Add-In.
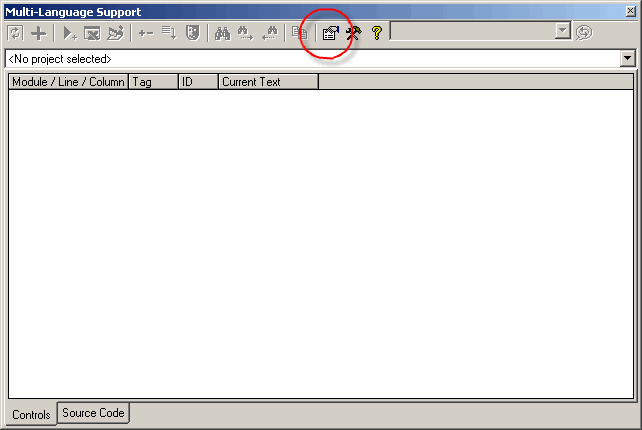
Open Visual Studio (or VB6) and start the Add-In. It is not necessary to open a project. Click on the Settings button on the toolbar. |
|
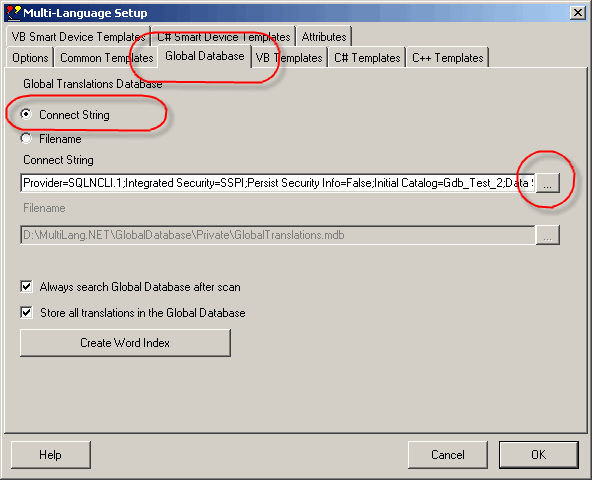
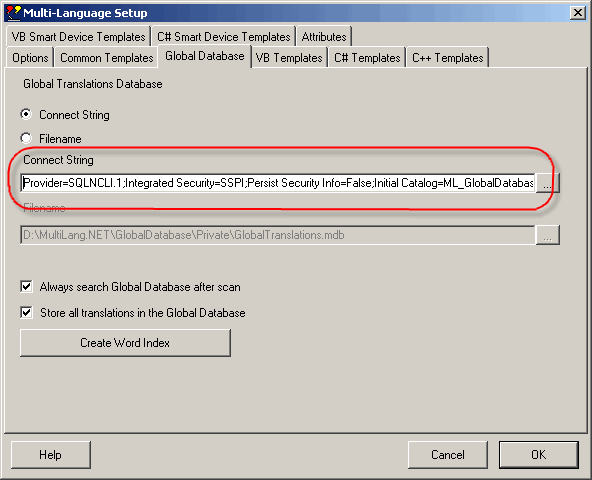
| In the settings dialog, select the Global Database tab. Select the option Connect String. Click on ... button next to the field for the connect string. This will start the standard OLEDB datalink connection dialog. |
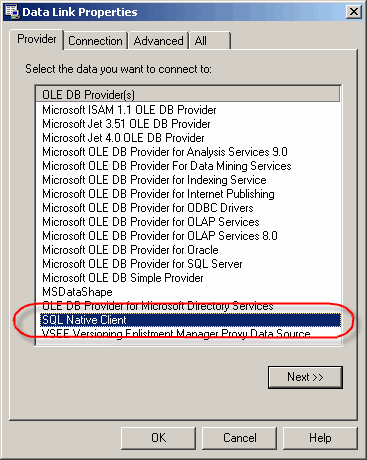
Select SQL Native Client. Click on Next. |
|
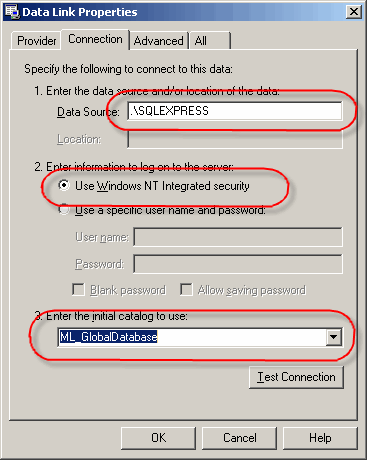
| Enter the name of the SQL Server. In this case, there is no dropdown list. If the database is on the local computer, you can specify the server:
Select the authentication method, typically Windows security. Select the database name. This must be the name you specified on importing the database into the SQL server. If the server name and authentication are specified correctly, you can select the database from a dropdown list. (If not, then will have to correct them anyway.) Click on OK to close the datalink dialog. |
The connect string defined by the datalink dialog should now be shown in the settings dialog. Click on OK to close the settings dialog. |
|
On closing the settings dialog, the Add-In will immediately open the database. If no error occurs, then everything is OK.
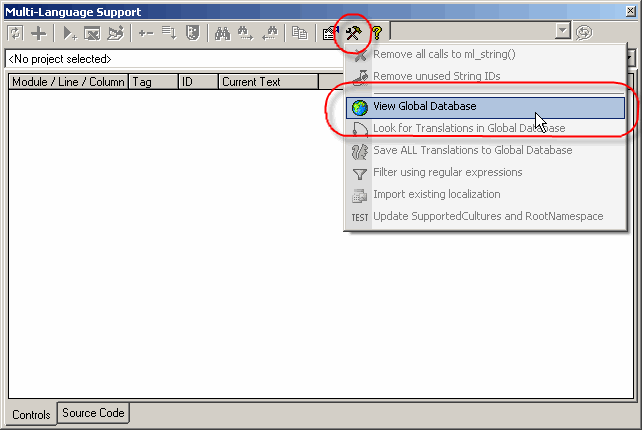
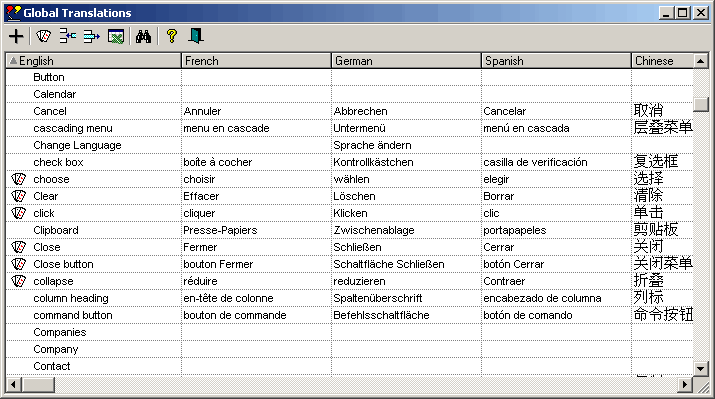
| To check that the database has been imported, you can view the contents via the tools menu. |
If there are a lot of texts in the database, then it may take a long time for this dialog to open. (This probably means that it is programmed badly, but this is not a very important feature of the Add-In.) |
|
Creating the global database with an SQL Script
I have not yet created SQL scripts to generate the global database. Let me know if you need these scripts, for SQL server or for other database servers.