Multi-Language for Visual Studio
Quick Tour (Unmanaged C++ and MFC)
Support for unmanaged C++ and MFC projects is available in the Add-In versions for Visual Studio 2005, 2008 and 2010.
MFC version 7 and later have support for satellite DLLs, which is the most practical method, if you want to be able to select a specific language. This quick tour assumes that you want to use satellite DLLs.
Activating the Multi-Language Add-In
After you have installed the Add-In, there will be a new menu item in the Tools menu in Visual Studio.
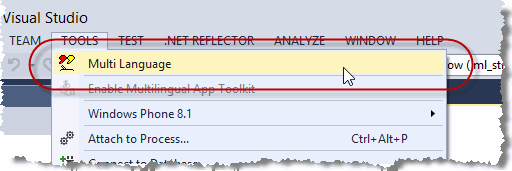
This menu item activates the Add-In and shows it in a tool-window. You can dock this window at the side of the main Visual Studio window, or drag it into a tab group, like other tool windows in Visual Studio. It's probably best to place it at the bottom, in a wide format.
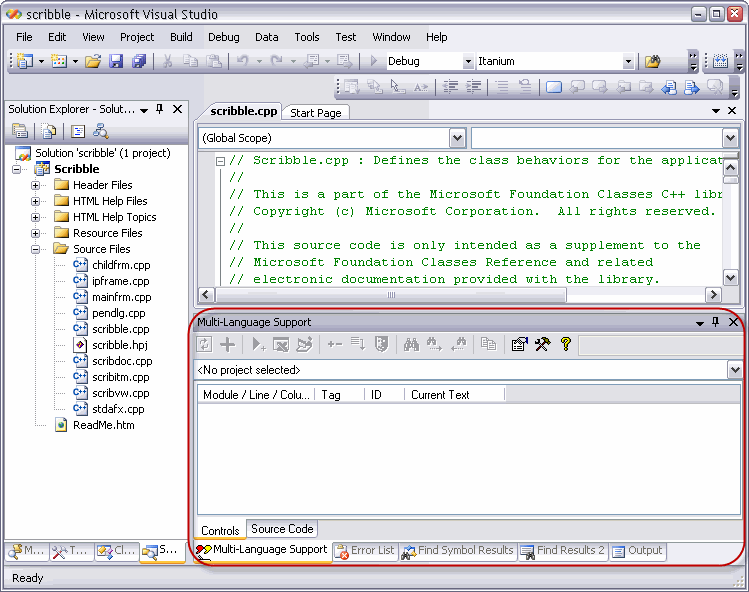
Selecting a project
A Visual Studio solution may contain multiple projects. However, the Multi-Language Add-In always works with a single project. To get started, you must first select the project. There are two ways to do this.
| from a dialog | When you select the Add-In from the tools menu, it will probably show a list of the projects in a dialog. Simply select the project and click on OK. 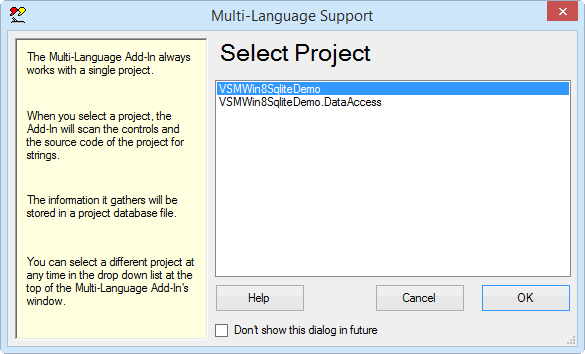
This dialog can be disabled, so if somebody else has already worked with the Add-In, it might not appear. |
| from a drop down list | At the top of the Add-In's main window, just below the toolbar, there is a drop down project list 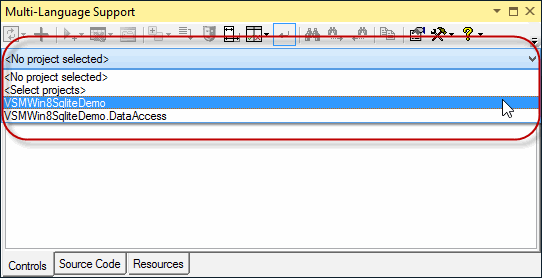
You can select a different project at any time from this list. |
Initialising the project for localization
The Add-In will automatically detect the languages defined in the resource script (.rc) file in your project. For a non-localized project, the resources will usually be defined for a single language. The Add-In assumes that the first language which it detects is the original language of the project.
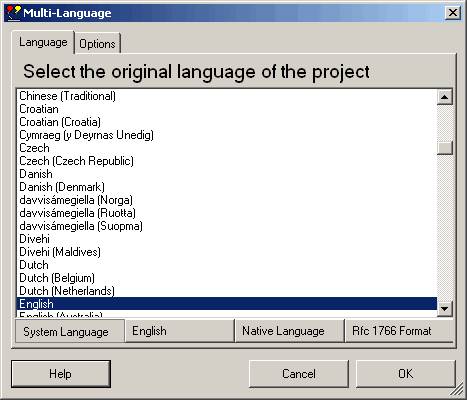
In the unlikely case, that no languages are defined in the .rc file, you must specify what the original language of the project is. The Add-In will show a list of the languages supported by Windows. Select the original language and click on OK. (The buttons below the list change the way the list is displayed. In particular, the button English simply shows the language names in English. It does not select English in the list). |
|
|
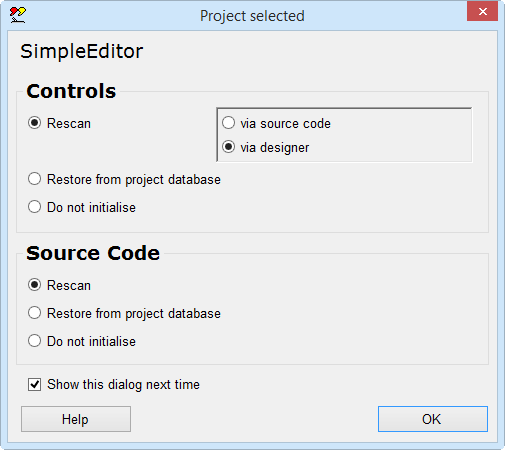
This dialog will probably be followed by second dialog, with options for scanning the project. Just click on OK to accept the default options. |
The Add-In will now add three new files to your project.
| <project name>_ml.xml | This is the project database used by the Add-In. |
| mlstring.h + .cpp | This module contains support functions, in particular the function ml_string(), which is used to load localized strings. |
Scanning the project
The Add-In will now scan the project. This is performed in two phases:
- scanning controls
- scanning source code
In the first phase, the Add-In scans the resource script (.rc) file for dialog and menu resources and extracts the texts from the resource definitions. In the second phase, the source code of the project is scanned for texts which may require translation.
|
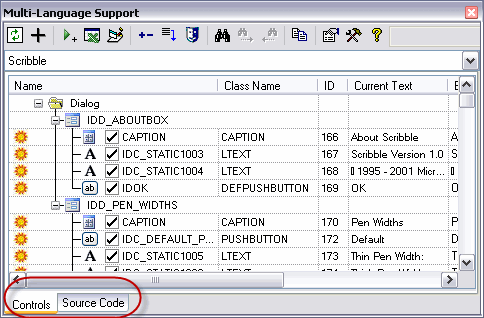
The results of the scan are displayed in two separate grids in the Add-In's window. You can switch between these grids using the tabs at the bottom of the window. |
| Read resource symbols | In this step, the Add-In reads the resource symbols defined in the file resource.h (in your project) and afxres.h (from Microsoft). |
| Import resource strings | In this step, the Add-In reads all resource strings in the .rc file and imports them into the Add-In's project database. The languages defined in the .rc file are also imported automatically. |
| Remove IDC_STATIC | In this step, the Add-In searchs the .rc file for use of the resource symbol IDC_STATIC. This symbol is commonly used for static controls, in particular labels, which never need to be referenced in the source code. For the Add-In, it is important to be able to identify each control with a unique ID (at least within a single dialog). For this reason, it replaces each use of IDC_STATIC with a unique symbol of the form IDC_STATICnnnn, where nnnn is the numerical value assigned to the control. The Add-In increments the symbol _APS_NEXT_CONTROL_VALUE in resource.h each time it generates a new symbol |
| Scan dialogs and menus | Finally, the Add-In actually scans the dialog and menu resources and extract the texts. |
Check the project settings
|
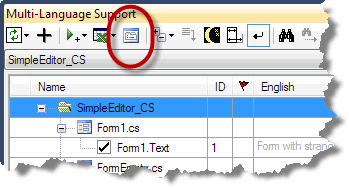
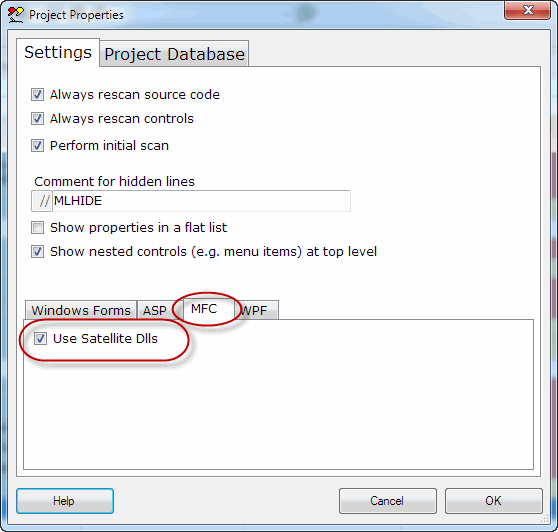
The default option for MFC projects should be to use satellite DLLs. You can check that this option is selected by clicking on the project properties button. |
|
This opens a dialog showing some project properties, in particular the option to use satellite DLLs. |
|
|
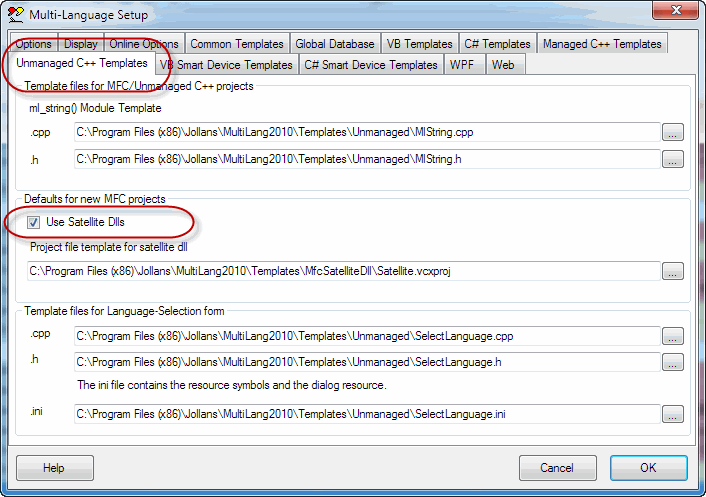
You can modify the default setting in the Add-In's options dialog. Click on the button shown here on the right, which opens the dialog shown below. The option to use satellite DLLs by default is on the tab Unmanged C++ templates. |

|
Adding a second language
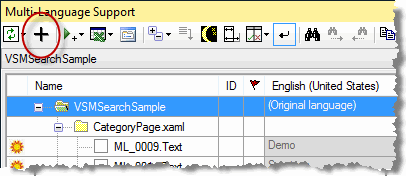
To add a new language to the project, click on the  symbol on the Add-In's toolbar
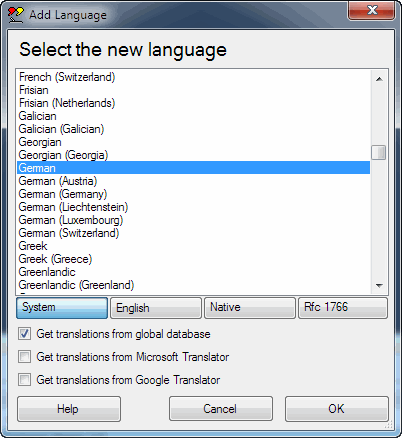
This brings up a dialog with a list of languages which are supported by windows. |
|
|
Select a new language and click on OK to add this language to the project. The options Get translations from Microsoft Translator and Get translations from Google Translator can be used to select online translation using one of these translation engines. This is a quick and easy way to translate the texts in your project, but the quality is likely to be poor. The check boxes are enabled if the combination of original language and new language is supported by the translation engine. |
Some languages, such as German or French, are considered to be neutral languages. The regional variations, such as German(Germany), German(Austria), French(France) or French(Canada) are referred to as specific languages. You should always add the neutral language before adding a related specific language. If you do choose to add a specific language, the Add-In will give you the option of adding both neutral and specific languages or only the neutral language.
I am not sure how well neutral languages are supported in unmanaged C++ projects. Let me know if you have problems with this.
After adding the second language, the Add-In will
- add a new column to the grids for the new language
- search for translations of common texts such as OK and Cancel in the Global Translations Database
- translate the remaining texts online using the Microsoft or Google translation engines, if you selected this option
Now we will take a closer look at the two grids.
The controls grid
To see the controls grid, make sure that the controls tab at the bottom of the window is selected. The grid should look something like the following screenshot.
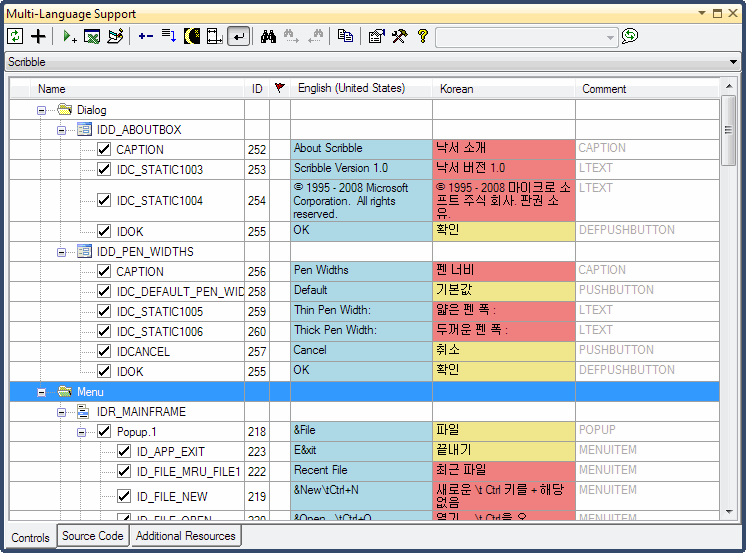
As you can see, the grid shows the texts from dialog resources and menu resources.
Structured list or flat list
|
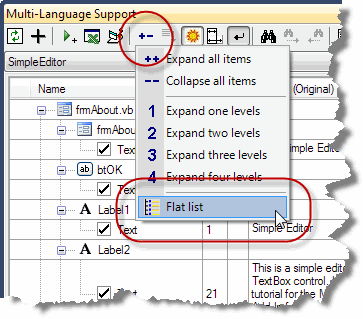
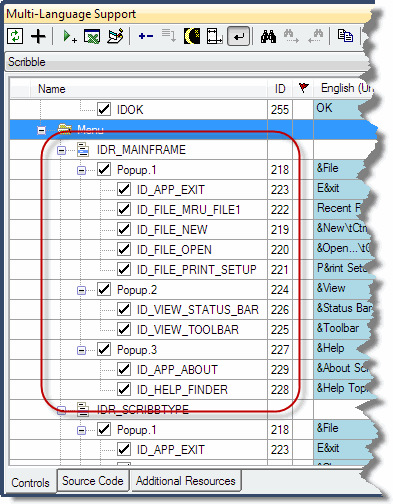
By default, menu resources are shown in a hierarchical manner, reflecting the structure of the menu. As an alternative, you can view the menu items in a flat list. To select this mode, click on the  button on the toolbar and then select Flat list from the menu, as shown below:
|
|
|
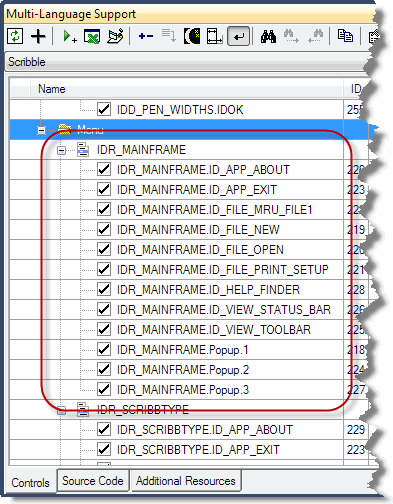
The menu will then be shown as in the second screenshot. This option has no effect on the display of dialog resources. |
|
Background colours
The background colours indicate the translation status as follows:
| White | Text has been edited in the grid |
| Blue | Original text |
| Yellow | Text from global database |
| Green | Text imported from Excel or Open Office spreadsheet |
| Red | Online translation from the Microsoft or Google Translators |
You can view and modify the translation via the context menu on each cell in the grid.
When you are editing a cell, you can use ALT-UP or ALT-DOWN to change the status to edited and move to the cell above or below. The gives you a quick way to mark an automatically translated text as OK, and change the background colour to white.
Entering translations
To enter a translation, simply click in cell and type in the new text. If you are able to translate the text yourself, this is the easiest way enter translations.
If a text is shown in light grey, then the text has been generated by the resource fallback mechanism. If a text is not defined for a specific language (e.g. Spanish(Mexico)) then the text for the neutral language (e.g. Spanish) will be used. If this has not been defined, then the original text in the project would be used.
For unmanaged C++ projects, the Add-In handles resource fallback when it exports the texts to the .rc file. The Win32 resource functions do not resource fallback. (In contrast, resource fallback is built in to the .NET common language runtime (CLR).
The check boxes to the left of the property name indicates that the text has been selected for translation. By default, all properties which contain a non empty string are selected.
The following screenshot is based on the MFC sample program CmnCtrl2. You can see that some of the controls have a text property which will not require translation.
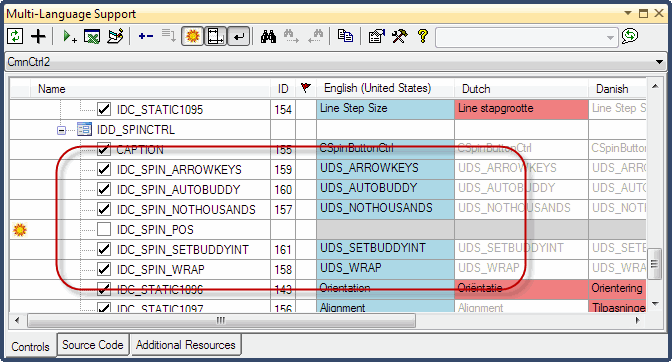
Since we do not want to translate these texts, we can deselect them by clicking on the check boxes.
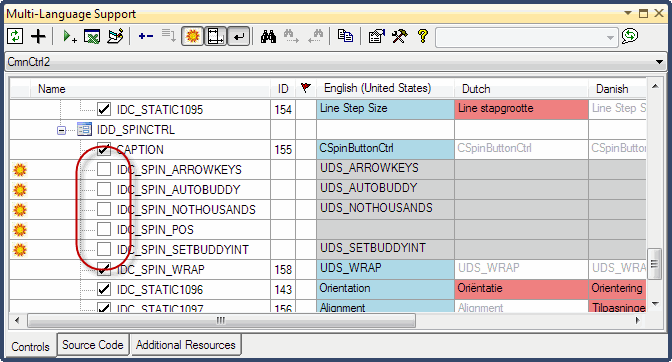
In fact, we never really want to see these properties again, so we can go one step further and hide them completely. To do this, we first click on the sun symbol  at the left hand margin. The sun symbol is replaced by a moon symbol
  .
.
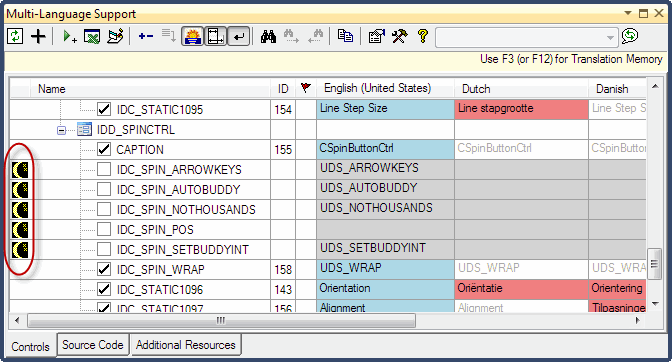
To actually hide the lines, click on the sun  or sunset
  symbol on the toolbar. This is a toggle button which usually displays the moon
  symbol when not pressed and the sun
  symbol when pressed, in which case hidden lines are actually hidden.
The sunset  symbol is shown when the button is pressed, but you have hidden additional lines (as above). The recently hidden lines remain visible until you click on the button again.
By default, properties containing empty strings are not shown in the grid. It very rarely makes sense to translate empty strings, so this if sensible setting. If you do want to see localizable properties containing empty strings, then you can modify this option in the settings dialog. To show this dialog click on the settings button  on the toolbar. Details of this and other options are described in the online help file.
The source code grid
To see the source code grid, make sure that the source code tab at the bottom of the window is selected. The grid should look something like the following screenshot.
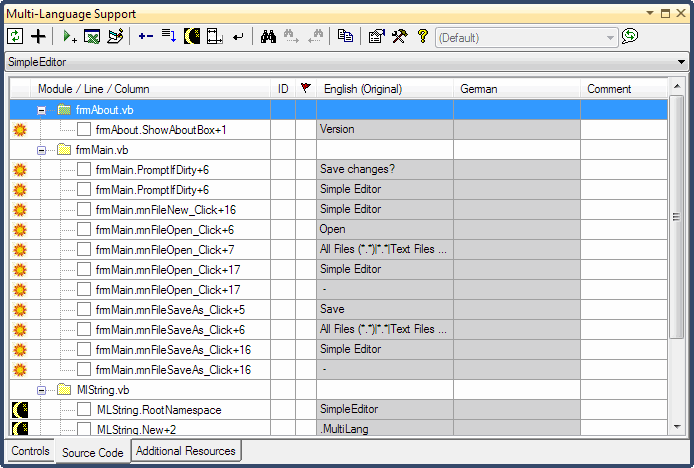
As in the controls grid, you can select a string for translation by clicking in the checkbox to the left of the line number. In contrast to the controls grid however, none of the texts are selected automatically.
When you click on a line in the source code grid, the corresponding line in the source code will be shown in the source editor. For a given string in the source editor, you can locate the corresponding line in the source code grid using the command Show in Multi-Language in the context menu. Alternatively, you can select the line in the source editor and click on the goto line button  on the toolbar.
 |
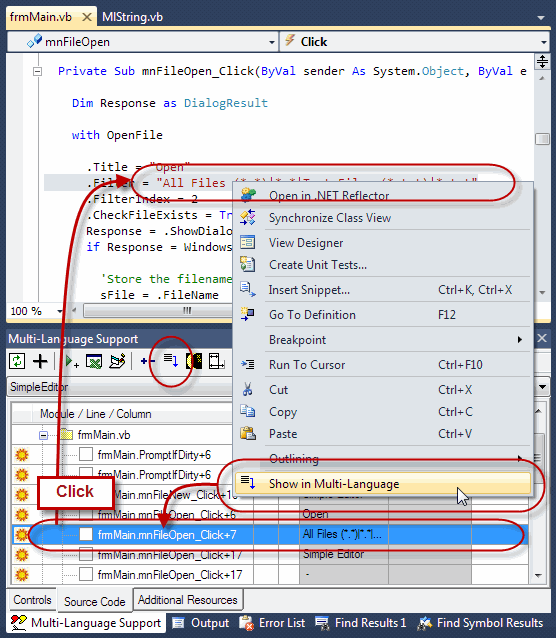
|
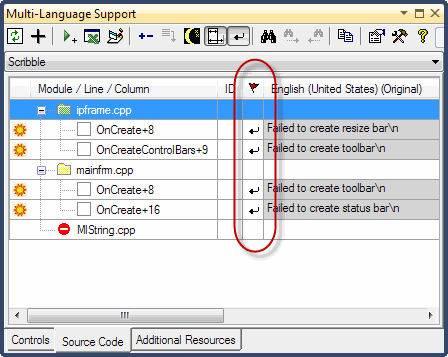
You may notice that the symbol  is displayed in the flag column on some lines. This simply indicates that the string contains an line break.
For unmanaged C++ projects, this has no real significance, since the the resource compiler (rc) accepts the same escape sequences as the C language. This is not the case for managed C++ projects. Escape sequences must be processed before storing strings in the .resx format. |
|
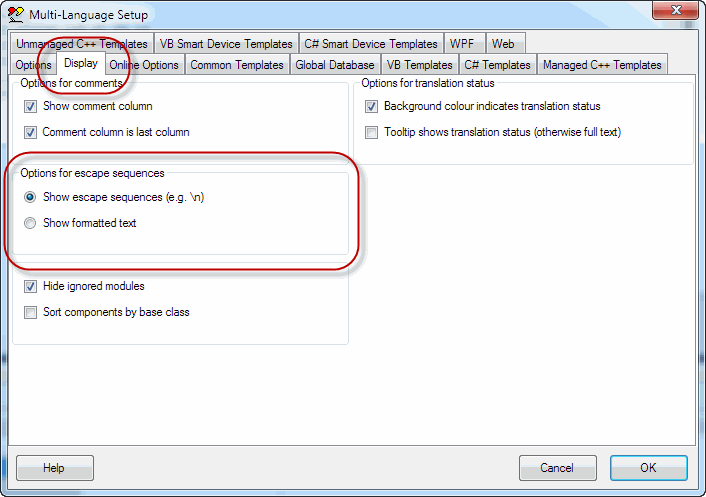
You can select whether the Add-In either:
- shows escape sequences as in the source code or
- processes the escape sequences before displaying the text (e.g. replaces \n with a line feed character)
with an option in the Add-In settings dialog, as shown below. As already described, you can open this dialog with the  button on the toolbar.
When you select a string for translation by clicking on the checkbox, the Add-In will assign a string ID number to the text and insert the macro ML_STRING into the source code.
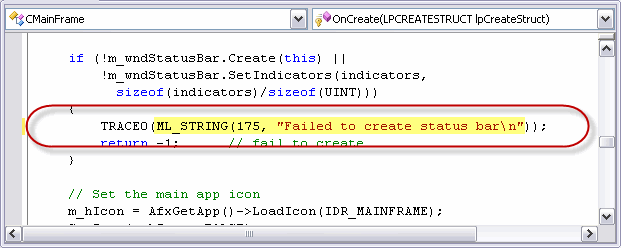
As you can see, this macro has two parameters:
- the String ID number and
- the original text
In fact only the string ID will actually be used, so you could consider the original text as a comment. Leaving the original text in the source code serves to make the code more readable.
The macro ML_STRING is defined in the file MlString.h. It generates a call to the function MultiLang::ml_string() which is defined in the file MlString.cpp. As already described, these files are automatically added to your project, when you start working with the Multi-Language Add-In.
The exact format is different in C# and VB.NET projects, but the principle is the same.
Once a string has been selected for translation, you can enter a translation simply by typing a new text into the grid.
As with the controls grid, we also have the option of hiding texts which do not require translation. In the screenshot above, we have in fact selected a string which we would probably not want to translate. It is unlikely that you would want to translate a TRACE statement.
As before, we hide a string by clicking on the sun symbol  at the left hand margin, which is then replaced by a moon symbol
  . At the same time, the comment //MLHIDE is added to the end of the source code line, to mark it as hidden.
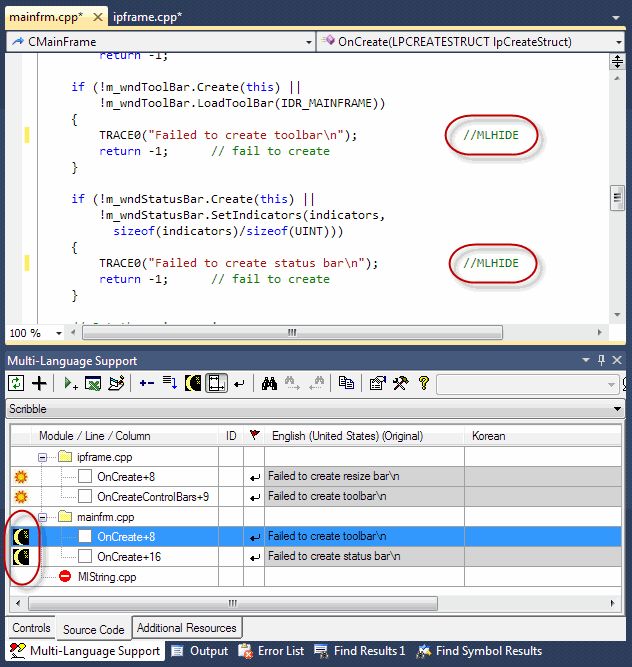
To actually hide the lines, click on the sun  or sunset
  symbol on the toolbar, as already described for the controls tab.
It is good practice to either select or hide every string in the project. If new strings are added to the source code, it is then much easier to find the new strings in the grid. Of course, you can also add the MLHIDE comment to lines in the source code editor. When the Add-In scans the project, it will automatically hide these strings.
Filtering texts with regular expressions
In many cases, you will be able to select, or alternativly hide, texts in the source code based on simple rules. For example you will probably not want to translate SQL strings, or the parameters to an event logging function. On the other hand, you will probably always want to translate the parameters to the MessageBox function.
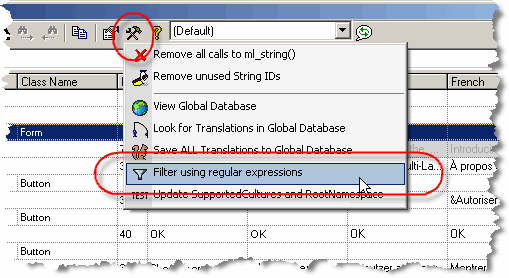
You can handle operations like this easily with the feature "Filter with regular expressions". You can select this option from the tools menu as shown below, or from the context menu in the source code grid.
This command shows the filter dialog, in which you can enter a search string as a regular expression. For example in the screenshot shown below, the search string "^select " will search for any string starting with the word select, with the option to hide the string.
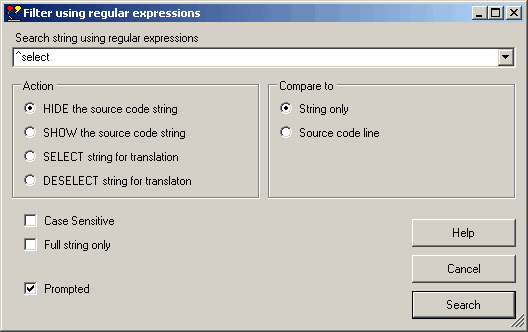
The dialog offers the option to match only the string, or the complete source code line. By matching the complete code line, it is easy to detect strings used in particular function calls.
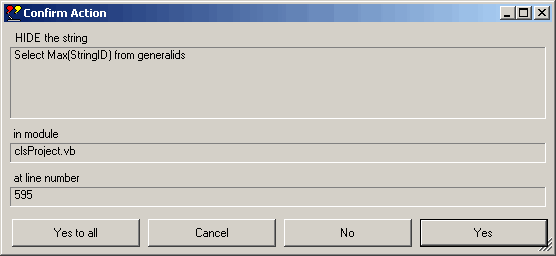
When the string is found, the Add-In asks whether the specific string should actually be hidden.
Using the translation memory
Aside from the project database used to store the translations for an individual project, the Multi-Language Add-In also stores all translations in global translations database. When it detects an exact match between a new text and a translation stored in the global database, it will insert the translation automatically. This is great for common terms like OK and Cancel.
If you are able to translate the texts yourself, then the translation memory provides an additional help, based on the translations stored in the global database. To use the translation memory, first click in the cell you want to edit, and then hit F3 or F12. The following screenshot shows the translation memory dialog with the text Add a new language to the project, which should be translated into German.
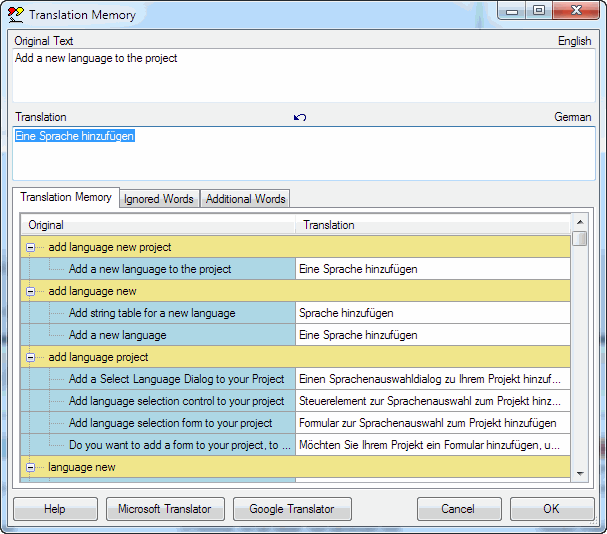
In the lower part of the dialog, there is list of existing translations, containing one or more of the same words as the string to be translated. The list is sorted according to the number of matching words, so the most useful translations should be near the top. You can copy words out of the grid and edit the new translation in the edit box marked Translation.
Obviously, the common words "a", "to" and "the" will not be of much help. If you select the tab Ignored words, you can select the words which are to be ignored. The Add-In keeps a list of ignored words in the global database and automatically ignores these words in future.
The translation memory feature is particularly useful for technical terms where you might not be familiar with the correct translation and where you want to use terms consistently.
As you can see, this dialog has buttons to translate the text using the Microsoft or Google translation engines. These buttons will be enabled if the combination of original and target language is supported and if the online service is available. This is a convenient way to translate a single text automatically.
Using the Spreadsheet export
If you are not able to translate the texts yourself, you will have to give them to a translator. For this purpose you can use the Spreadsheet export/import feature. There are two versions of this feature:
- the simple version with one worksheet and no macros (for Excel or OpenOffice)
- the three worksheet structured export with macro support (for Excel)
Both versions are accessed via the Excel symbol  on the toolbar.
The screenshot below shows the format of the simple spreadsheet file. As you can see, the first column contains the string ID number, followed by a column for each language. The first two rows contain the language names and the locale ID numbers.
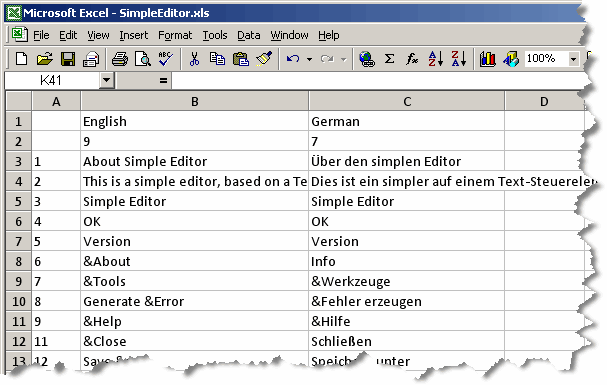
The translator should update texts in the appropriate language column, without changing the format of the file. When the translator is complete, you can import the translations back into the project.
The three worksheet format contains two additional worksheets, which closely resemble the controls grid and the source code grid in the Add-In. These worksheets provide more context information for the translator. Because all texts in the additional worksheets are also present in the third worksheet, Excel macros are used to maintain consistency within the file. The macros also provide some additional functionality, similar to some of the functions provided by the Add-In.
The three worksheet is to be recommended, unless your organization is adamantly opposed to using macros.
Generating the satellite DLLs
For each language in your project, the Multi-Language Add-In will add an additional project to your solution to generate a satellite DLL. This should happen automatically.
The satellite DLL projects are configured to generate the DLL in a subdirectory of the output directory of the main project. The language tag, e.g. "de" is used as the directory name. This is basically the same standard as used by Windows Forms (.NET) projects.
You can find more information about the satellite DLLs and the directory structure in the article MFC Satellite DLLs.
|
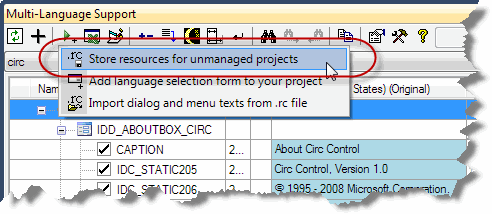
If for some reason the satellite DLLs are not generated, or you do not think they are up to date, you can regenerated them using the command Store resources for unmanaged projects in the runtime support menu. You can show this menu by clicking on the runtime support symbol  on the toolbar.
 |
|
Selecting the language of the application
In order to use the satellite DLLs, you need to add some code to your project.
If you want to code this yourself, all you need to do is:
- get a path to the DLL
- load it with the function LoadLibrary()
- call the MFC function AfxSetResourceHandle() specifying the handle of module handle returned by LoadLibrary().
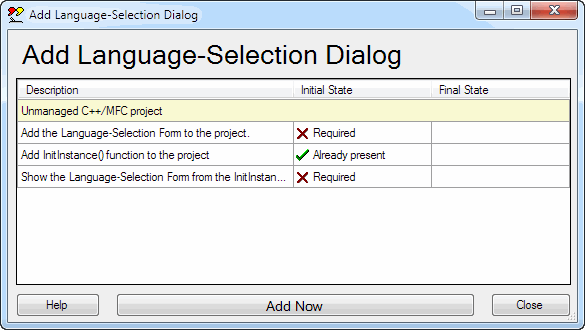
However, the Add-In can add a dialog to your project, with which the user can select the language to be used and which contains all necessary code to load the satellite DLL.
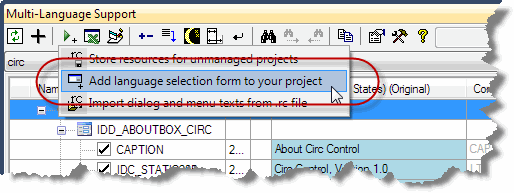
To do this, click on the runtime support symbol  on the toolbar and select the command Add language selection form to your project.
 |
|
|
This will show a dialog listing the actions which need to be performed. Simply click on Add Now to the add the dialog to your project. |
The language selection form is defined in three template files:
- SelectLanguage.h
- SelectLanguage.cpp
- SelectLanguage.ini, which contains:
- a list of symbols which will be added to your resource.h file
- a dialog resource which will be added to your project's .rc file
The Add-In will add the .h and .cpp files to your project and add the dialog resource to your .rc file.
In addition, it will add code to your InitInstance function to show the language selection dialog.
BOOL CScribbleApp::InitInstance()
{
    CSelectLanguage sl ;
    sl.LoadSettingsAndShow() ;
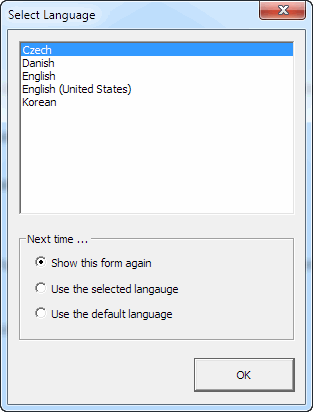
When you start the application, the language selection form creates a list of languages, based on:
You should ensure that the DLLs are installed on a target machine in these directories. |
|
Of course, you do not have to stick to this scheme. You can modify the language selection form to follow any convention that you like.
When you click on OK to close the language selection dialog, the satellite DLL is loaded and will be used by MFC to load all resources.